Unlock The Power Of Enhanced Conversions In Google Ads
Discover the power of Enhanced Conversions in Google Ads. Learn how this feature can help you optimise campaigns while respecting user privacy.
Oops! We could not locate your form.
Discover the power of Enhanced Conversions in Google Ads. Learn how this feature can help you optimise campaigns while respecting user privacy.
Edit: This post has been edited to reflect an implementation changes from Tag Manager in 2025. For more information on this implementation change, you can refer to this post.
Digital marketing is constantly evolving, and with privacy a core theme in recent years, huge changes have been taking place to allow marketers to balance privacy of users on the web, with the collection of marketing data (for both measuring campaign success and for creating more targeted advertising campaigns.)
Where other browsers have said goodbye to 3rd party cookies, Google has now said that it won’t be deprecating 3rd party cookies in the Chrome browser. Instead, users will be given the choice of how their privacy is managed.
However, with the introduction of Consent Mode and Enhanced Conversions, seeking ways to improve/hold on to marketing data, whilst complying with privacy laws around the globe has definitely been a priority for Google.
Despite rising CPCs and ever growing competition, Google Ads remains a cornerstone of online advertising. Google continues to innovate with features designed to help maximise the effectiveness of your campaigns, and the quality of measurement for those campaigns.
One such feature is Enhanced Conversions.
Enhanced Conversions is a tool within Google Ads that allows advertisers to capture and utilise first-party data securely, to provide more accuracy in measuring conversions, which in turn should help to improve the performance of campaigns.
This feature enhances standard Google Ads conversion tracking by incorporating additional information, such as email addresses, phone numbers, or other customer data, that can help match conversions to ad interactions more precisely.
Enhanced Conversions work by securely collecting and hashing first-party user data when an Ads conversion takes place, then matching this data to Google accounts. This process helps attribute conversions more accurately, even in a privacy-centric world where third-party cookies are becoming less reliable.
Here’s a step-by-step breakdown of the process:
Enhanced Conversions offer several key benefits that can significantly impact your advertising performance:
Setting up Enhanced Conversions in Google Ads is a pretty straightforward process. In most circumstances you will not need to enlist the help of your web developer to create your enhanced conversions, as you can create them within Google Ads and Google Tag Manager.
Even so, we’ve had several clients and their marketing partners reach out for assistance on setting them up, so I figured it would be a good idea to create some basic guidance on the process.
This guide is for those using Google Ads in combination with Google Tag Manager to manage conversion tracking.
First and foremost, you need to make sure you have Enhanced Conversion allowed in the Google Ads account you are working on.
Navigate to Goals > Conversions > Settings
Here you will find the following options.


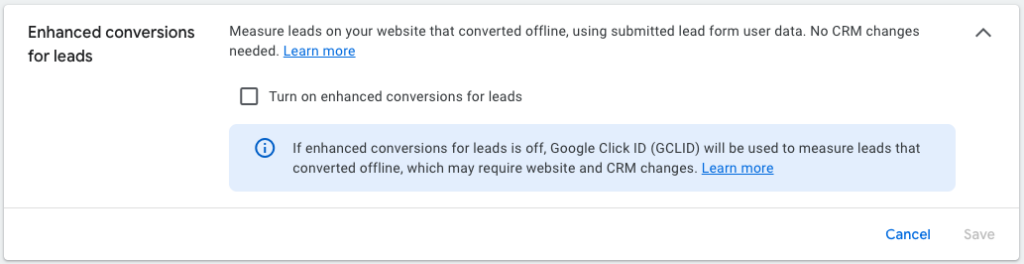
Enhanced conversions for leads is for if you wish to measure website leads that convert offline. I won’t be covering these in this post, but there is a great video from Measure School that shows you how to create these step-by-step.
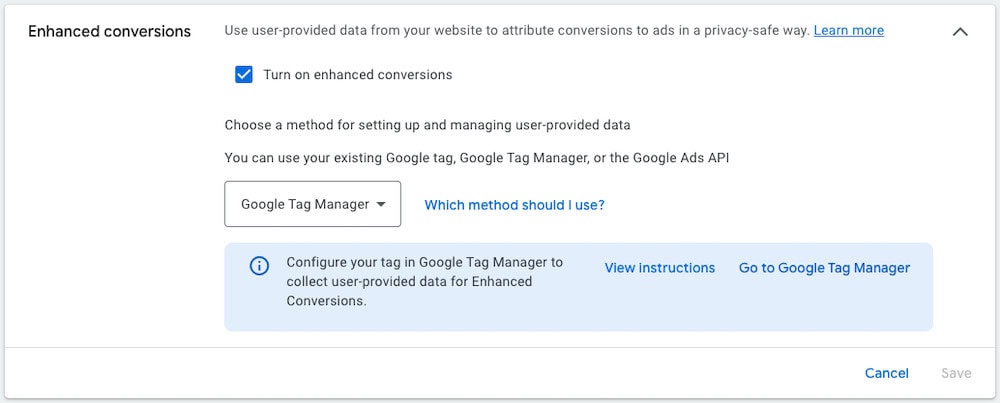
We’re interested in Enhanced Conversions, so ensure you have ticked the box to turn them on, and then choose your method. I have selected Tag Manager as that is what I’ll be covering in this post.

Make sure you save your choices before navigating away.
The types of conversions you are currently using in your Google Ads account, will dictate whether they can be used and upgraded to Enhanced Conversions, or if you’ll need to create new conversions.
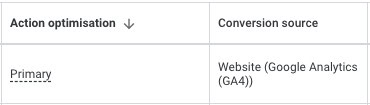
Enhanced Conversions need to be conversions created in Google Ads. So if you are currently importing your conversion from GA4, you will need to create new Ads Conversions.

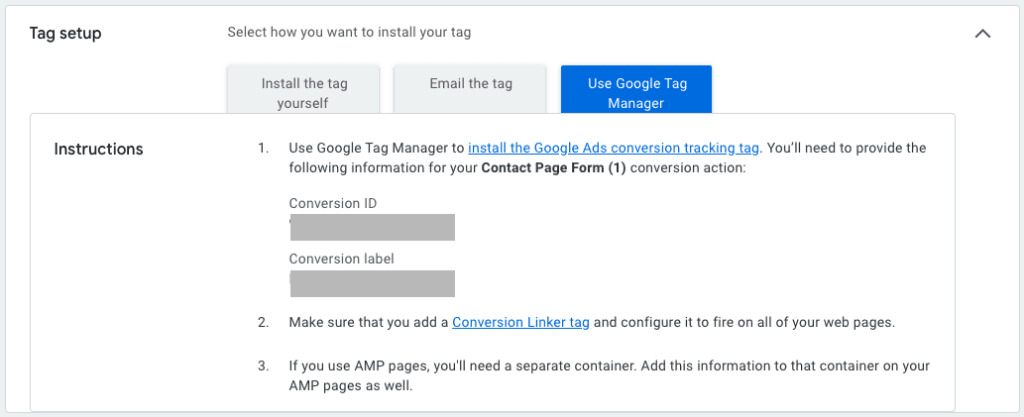
Then you’ll need to implement these new conversions on your site with Tag Manager using the Conversion ID and Conversion label. These can be found in Google Ads in the tag set up section in your conversion’s setting. If you click on Use Google Tag Manager, you will see them there.


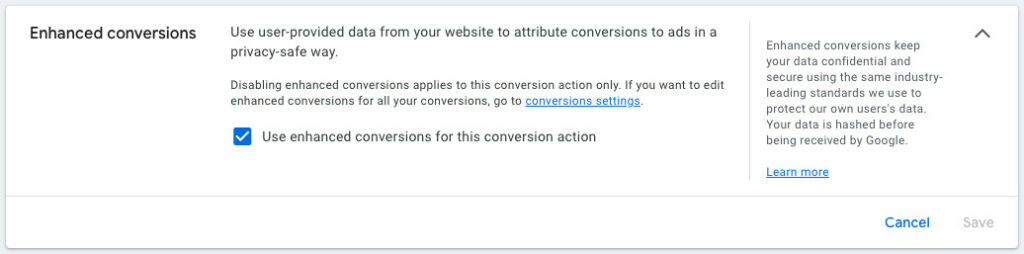
If you’re already using Google Ads created conversions that have been implemented on your site via Tag Manager, the process will be a bit simpler. But you will need to turn on Enhanced in the setting of each individual conversion’s settings.
Choose the conversion action you want to enhance. This could be a purchase, lead form submission, or any other conversion type you’re tracking. Within the settings for the selected conversion action, look for the Enhanced Conversions option and tick the checkbox, then save.

Whether you’re updating your existing Google Ads conversion tracking or you’ve created new conversions to track, as we discussed in the last step, you’ll now need to get those Google Ads Conversion Tracking tags set up for Enhanced Conversions too.
You’ll need the corresponding Tag Manager account open and the page on which your conversion action takes place.
There are three ways to set up Enhanced Conversions in Google Tag Manager. Automatic, Manual and via Code added to your site. I’ll cover the first two options in this post, as you would likely require a developer to implement the third way.
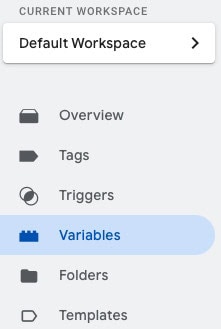
For both Automatic and Manual methods, you’ll need to create a variable. Head to variables in Tag Manager and scroll down the User-Defined variables section.


I’ll provide examples below of both automatic and manual. Google provides more information here.
As stated in Google’s own documentation, Automatic is the easiest option to implement, but it’s not as reliable as adding a code snippet to your website or specifying CSS selectors or Javascript variables.
2025 Edit for continued accuracy – there were 2 options for setting up automatic collection for enhanced conversions. One was removed in 2025, so I have removed references to that option from this section, and edited the screenshot below (as it contained both methods).

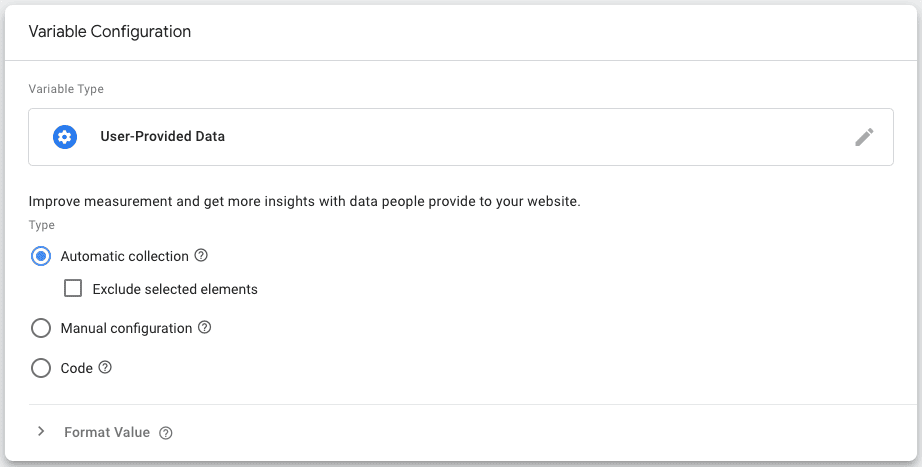
Step 1 – Click ‘New’ to create a new User-Defined Variable. Click on Variable Configuration and a list will appear. Scroll down to User-Provided Data and select it. Tick the radio button for automatic collection. You can also set exclusions here if needed.

Save and give your variable a name.
Step 2 – To create an Automatic Enhanced Conversion With A User-Provided Data Tag
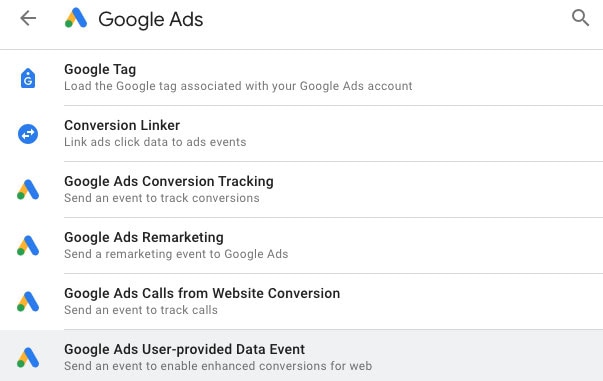
Navigate back to the Tags section and click ‘New’ to create a new tag. Under the Google Ads tags options select Google Ads User-Provided Data Event.

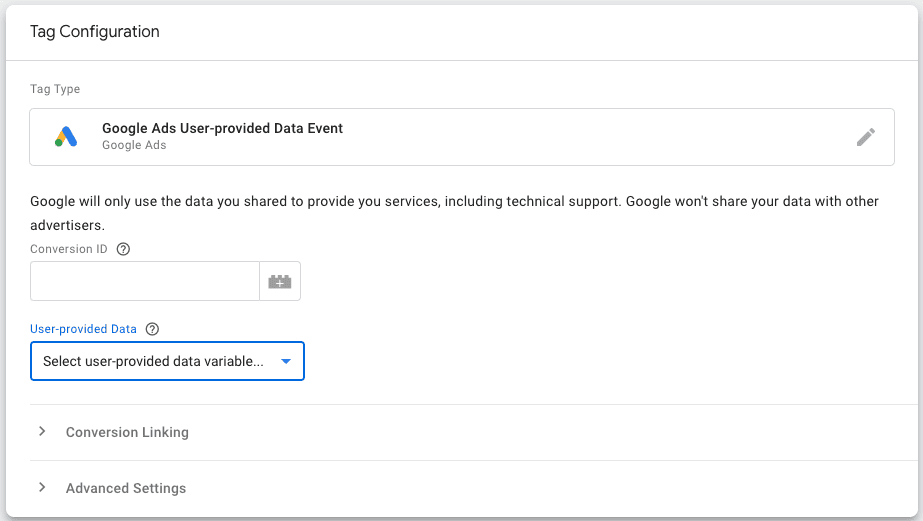
Here you need to add your Google Ads Conversion ID, that we talked about earlier. Then click on the user-provided data dropdown. Here you will see the variable you just created. Add this.

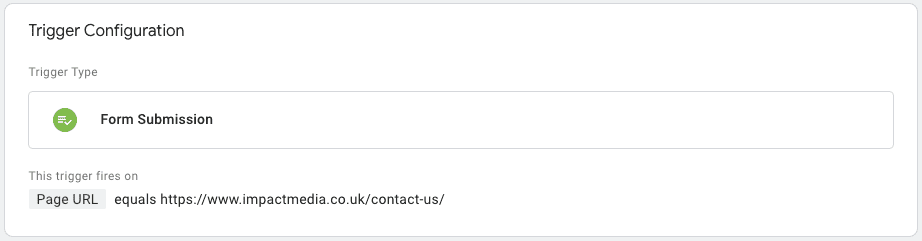
Next you need to create your trigger, which will be the same as the trigger for the Google Ads Conversion Event. So in this case it is the form completion event I created earlier.

If you will be collecting the same user-provided data across multiple conversions, you could instead set the trigger to all pages.

Save this and publish your container updates.
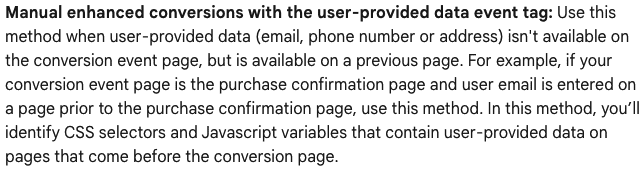
Manual is my preferred way of implementing this as it is more reliable and easier to verify and debug. It does have a few extra steps though.
2025 Edit for continued accuracy – there were 2 options for setting up manual collection for enhanced conversions. One was removed in 2025, so I have removed references to that option from this section, and edited the screenshot below (as it contained both methods).

There are multiple ways to create the User-Defined Variable you need for the manual method, so depending on how your conversion works and how the page is built, you will have a few options to choose from.
Step 1 – As we did for the Automatic method, click ‘New’ to create a new User-Defined Variable.
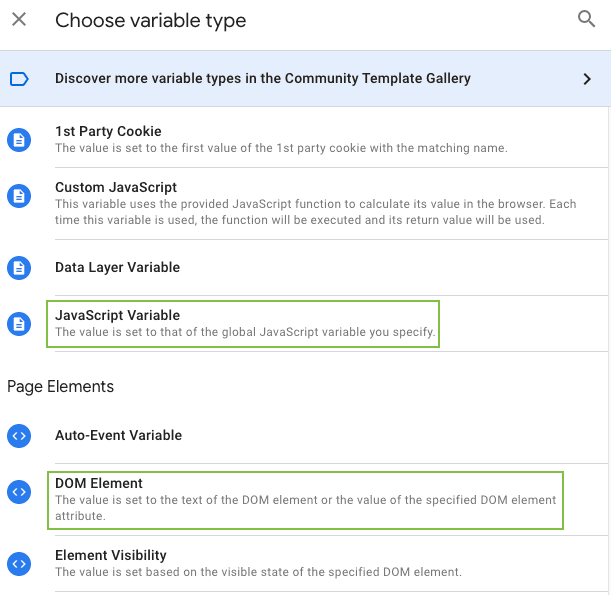
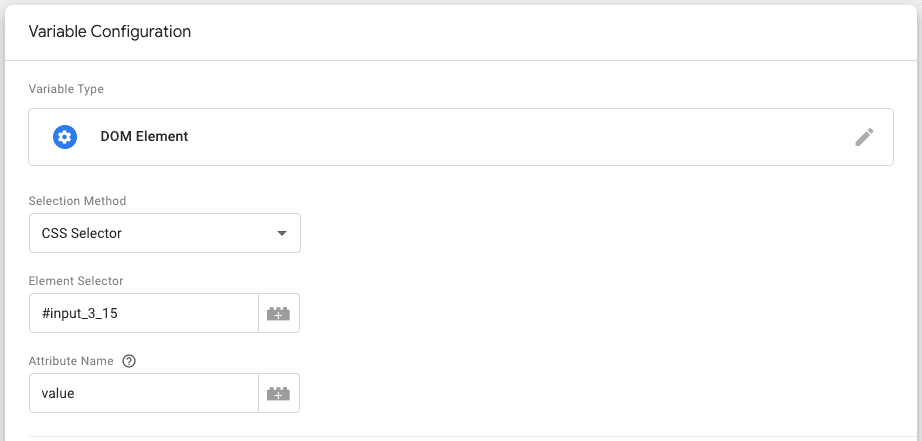
Click on Variable Configuration and the same list will appear. Scroll down to DOM Element, if using CSS selectors. If you’re using JavaScript variable, select JavaScript Variable from the list. I’ll be using a CSS selector in this example.

Step 2 – Now you need to go to the page that your conversion happens on. In this case it is our Contact Page. Then decide the user-provided data that you wish to use. In this case I’m using the email address, but you can also use phone number and address among others.
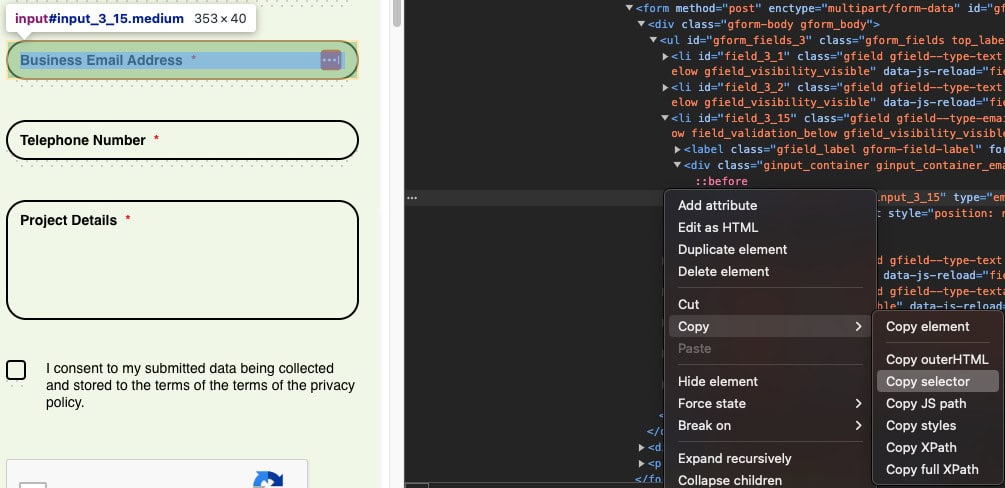
On the Contact Page Form which is the conversion we’re working on, right click on the email field (in this case) and select inspect. You will need to do this step for each type of user data you intend to collect.
On the highlighted line of code, right click > Copy > Copy selector.

Step 3 – Then return to Tag Manager and where you selected DOM Element, you’ll see Variable Configuration. Select CSS Selector from the dropdown. Then paste the selector you copied from your conversion page in to the Element Selector field. Give the variable a name and save it.

Step 4 – To create a Manual Enhanced Conversion With A User-Provided Data Tag
As with the automatic version of this method, navigate back to the Tags section and click ‘New’ to create a new tag. Under the Google Ads tags options select Google Ads User-Provided Data Event.

Here you need to add your Google Ads Conversion ID, that we talked about earlier. Then click on the user-provided data dropdown. Here you will see the variable you just created. Add this.

Next you need to create your trigger, which will be the same as the trigger for the Google Ads Conversion Event. So in this case it is the form completion event I created earlier.

If you will be collecting the same user-provided data across multiple conversions, you could instead set the trigger to all pages.

Save this and publish your container updates.
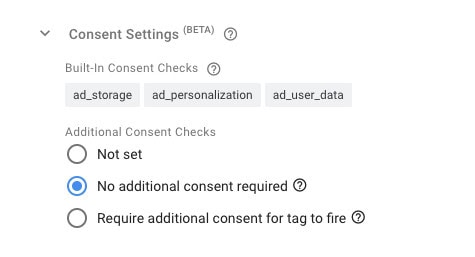
Now that Consent Mode exists, don’t forget to update the consent settings for any tags you’ve created in Tag Manager.
As these are Google tags with built in consent, you can mark them as ‘no additional consent required’.

Once you have created your Enhanced Conversion, you need to make sure they’re actually working. You can use the Tag Manager Tag Assistant to make sure your tags are firing correctly, as you would with any tag you’ve created.
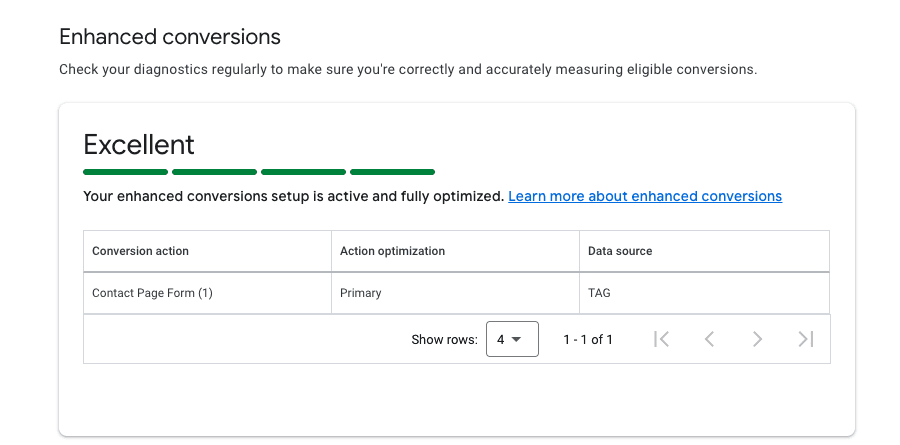
The easiest way to make sure your Enhanced Conversion are working is via Google Ads, but you’ll want to give it up to 48 hours. Then navigate to the conversion in question and check the diagnostics.
Next to the conversion you want to check, hover over ‘status’. Here you can see for our demo conversion, that a popup shows that enhanced conversions is active.

Clicking on ‘go to diagnostics’ will provide further information. Especially if your enhanced conversions are not working and you need to debug.

I hope this has helped you implement enhanced conversions for your own Google Ads account.
We include Google Tag Manager in each site we build, as it is such an invaluable tool for marketing teams. It definitely makes the process of implementing enhanced conversions more straightforward, and achievable without needing developer assistance.
Discover the key factors in a successful domain migration. Understand the risks before making this crucial change.
Vikki Baker
Stay informed about the latest developments in email tracking. Compliance in the EU and UK is more complex than ever for businesses.
Vikki Baker
This post is designed to help marketing teams and professionals without an SEO background, who have access to their company's Search Console account, and are daunted by the Page Indexing report.
Vikki Baker