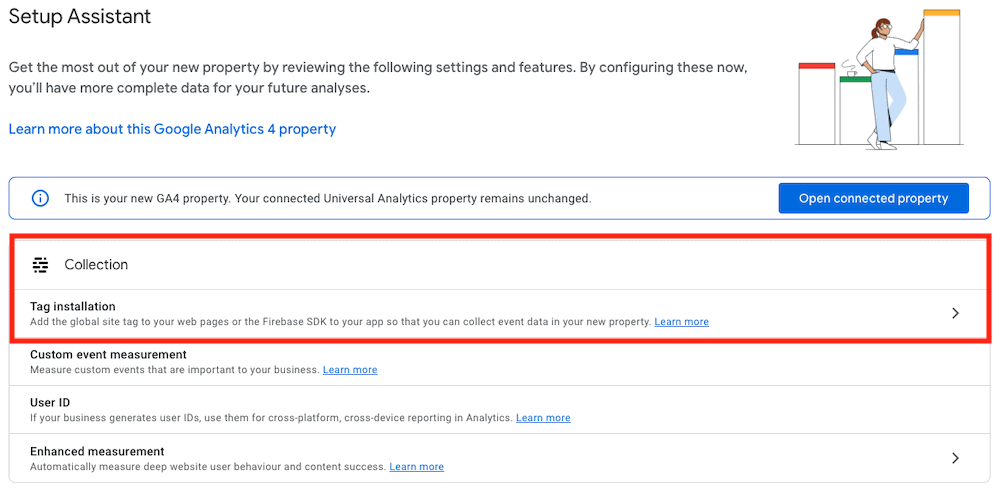
With Google announcing the end of Universal Analytics next year, here is why you should get GA4 set up if you haven’t already, and the basics of how to do so.
Yesterday Google announced that Universal Analytics will be retired in 2023. This news was met with a lot of disappointment. Its replacement Google Analytics 4 (GA4) has seen a very slow uptake among marketers. Many find it lacks the user friendliness of Universal Analytics (UA).
I’m old enough to remember when Universal Analytics replaced Classic Google Analytics. There was a fair amount of griping then too. People don’t like change, and GA4 is certainly different.
Of course, there are other Analytics platforms you can consider. But if you’re planning to stick with Google, or are undecided, it’s best to at least get your account set up now.
Why You Should Get It Set Up Now
You can run GA4 alongside your UA account for now, and let it start collecting data. It will also give you time to get to grips with it.
Even more importantly, when you set up a GA4 property, it is a fresh account with no historical data. Getting it set up now, will give you a good year and a bit of data collection, before UA disappears from your life.
Setting Up GA4
This is pretty straightforward, and Google have an assistant to help.
Login to your Analytics account, head to the admin tab, and under property, you will see the GA4 Setup Assistant.
Select this and you will be met with one of two screens:
If you or someone has already set up your GA4 account, it will look like this:
If not, you’ll see this:
Press Get Started, and depending on what Google tags you have on your site already, the assistant will advise you as to whether new tags will need adding.
In this example the site in question doesn’t have the gtag.js (Google’s Global Site Tag). It only has the standard UA analytics.js tag:
If you’ve already got gtag.js on your website, you won’t see this warning. You’ll be able to Enable data collection using your existing tags.
But if you don’t, or it’s implemented with Tag Manager for another product, there will be a couple of extra steps I’ll cover.
Select Create property, and your GA4 account will be created:
If you already had gtag.js on your site, it should start receiving data. Go to Tag installation and look for whether the data stream has been receiving traffic. This may take a little while to show.
Adding Or Connecting Gtag.js
Now, next is to sort out that Global Site Tag if you don’t already have one onsite, or if it’s implemented with Tag Manager for another Google product. Gtag.js is used by a number of Google products, and one instance can be used to connect them all.
Select See your GA4 property, and it’ll take you there, opening it in a new window.
Don’t worry, your UA property is still there (until 2023) and you can easily get back to it, either from the open tab it was in, in your browser, or from the account drop down in the top left corner.
Go to Tag installation, and the available stream. I’ve removed any identifying information from these screenshots, so yours will have your account information in certain places, which these don’t show:
Now you’ll be given options for adding gtag.js to your website. Either directly (it provides the necessary code snippet), or through Tag Manager if you have it (which uses your measurement ID, which you’ll see at the top of the page, starting with G-).
Depending on which way the tag will be added, provide your developer or the person who manages your Tag Manager account with the snippet or ID, and they can get it added to your site.
Once added, GA4 will be able to start receiving data.
That’s your initial setup done. You now have a GA4 account collecting data!